
==============================================================================================================
Foreword: This article features Hammer's Reach, Under Hammer, Thunder Hammer & Relics of Kounat.
Links*:
Once a new revamp article is published, the links to similar articles will be featured here.
Xenia 1 (Xenia Border - Wyrm's Maw)
Xenia 2 (Altar of Judgement - Fortress of Ascension)
Alcubra 1 (Goblin Work Site - Sands of Illusion)
Alcubra 2 (Deserted Town - Seth's Pyramid)
Archimedia 2 (Zeruel Border - Kounat's Collapse)
Once again,
1) I will liberally use made-up names for some of their attacks if I have to, and make them as easy to visually recall as possible.
2) I'm using my Lv85 Lire for damage-soaking experiments, thanks to her supposedly neutral balance of stats across the board especially in defense (Elesis would return false results because of her innately very high defense).
3) I will assess monsters by their Threat (Reactions) and Offensive (General attack strength) levels. it can be anywhere from levels ↓↓↓ to ↑↑↑ to • (indicates null change/neutral).
4) Telegraphing is the action taken to indicate attacks., from the new indicative red lines to magical glyphs where the attack projects itself, or simply body language from the monster.
So are we cool? Let's go~ (*゜▽゜ノノ゛☆
==============================================================================================================
 Hammer's Reach
(Threat Level: ↓↓) (Offensive Power: ↑)
Smiths no long attack via melee, and opt to throw their hammers instead. Going close to them causes to often avoid you instead, though this is not always the case.
(Threat Level: ↓) (Offensive Power: ↑)
The Berserkers are similar to Brutus from the Goblin Work Site, except that they are less dangerous as compared to him even at their level. They will use a simple smash attack or "Jump" attack only, otherwise they're easy targets.
Mini-Boss:
(Threat Level: ↑) (Offensive Power: ↓)
The only thing going for this mini-boss is his fast attack speeds. Much of the damage it used to deal has been reduced and it doesn't boast a lot of HP for a Mini-boss either.
Tactical Solutions:
Its nastiest attacks are the fire beam and the machine gun which it uses more often than its mines. This also forces players to reposition often to avoid getting hit. Stall its attacks by changing elevation as much as you can.
Boss:
(Threat Level: ↓↓↓) (Offensive Power: ↑↑↑)
Tactical Solutions:
Despite the obvious downgrades, don't be fooled. Talin still boasts high attack power capable of wasting you with each attack. The only thing you no longer need to worry about is again, that bomb. Use dodge efficiently here as you will need it often to get behind him, and Talin is sometimes too tall a target to cross over safely before he already attacks you with something.

(Threat Level: ↓↓) (Offensive Power: ↓)
They used to be a problem because they could perform jump attacks when changing elevations, all they have left is a slow melee combo to go for.
Tactical Solutions:
The bucket arm is the thing you should keep an eye out for. Not only does it have reach but the arm is full contact meaning touching any part of it when it swings will register a hit on you, it can also hit anything one platform beneath the point of impact. But without that ridiculous missile shockwave and spin attack, the Power Shovel is easier to stay on and bring down.
Boss:
(Threat Level: ↑↑↑) (Offensive Power: ↑↑↑)
(Threat Level: ↑↑↑) (Offensive Power: ↑↑↑)
Tactical Solutions:
Depending on your caliber, this could potentially be one of the most dangerous boss fights for casual players. Despite having dramatically lowered HP as a boss pair, their attacks are severely upgraded and deal massive burst damage all over the place. Taking them down together is not always the ideal conclusion but it saves a player from a lot of later pain. Do not rush against them- this is a high-adrenaline boss fight that requires a good level of tenacity and sharp wit in tackling them both.
Be warned that their Enrage mode will boost the surviving Sentry with 2x damage and defense, turning them into extremely lethal attackers.

(Threat Level: ↓↓) (Offensive Power: ↓)
The Mecha Taurus is a cousin to the Spiderbot Guard found in Hammer's Reach, but a very much weaker variant. However, it boasts unusually high HP for a regular mob.
Tactical Solutions:
In a team of at least 2, both players(teams) simply need to wait end on end to quickly deliver enough hits to him whenever he teleports around. If you're solo, tough luck, it'll take a while longer than usual. Don't waste your powerful skills on him unless they have high hit counts, as all damage to Void is dealt as "1" and he cannot be technically stunned, allowing him to just teleport away in the midst of a multi-hit attack.
Boss:
(Threat Level: ↑↑) (Offensive Power: ↑↑↑)
(Threat Level: ↑) (Offensive Power: ↑↑)
The uncarded Thunder Hammer Defender is found only with Arawn and can be resummoned by him at will. Despite their notorious and historical toughness, the ones defending Arawn are pretty toned down and easier to defeat.
Tactical Solutions:
Arawn is stationary most of the time but can quickly attack with his hammer swings. Always be alert and try to level with him if you can, as the elevation change game is not in your favour with the shockwave produced from his jumps, although it's only chip damage. Taking down the stubborn Defenders will ease the pressure for you, at least until he resummons them.
Note:
Arawn appears as Archimedia's Gate Boss with 87x HP. Do not be fooled as this Arawn variant is extremely deadly! Particularly 3 of his attacks, the regular melee smash, the fire pillars he summons and the hammer drop all deal immense damage in just one blow. (I received 3000+ per hit for the record, the hammer drop is cumulated damage)
Unless you have a death wish and are amply fortified, do not engage this Gate Boss carelessly.

(Threat Level: •) (Offensive Power: ↑)
The Mage on the other hand is contrastingly stronger than the Garou. With the ability to cast homing projectiles, it forces players on their feet to avoid them.
(Threat Level: ↓↓) (Offensive Power: ↓)
Berserker remain about the same but slightly weaker than before. They used to deal large amounts of damage is you were unfortunately caught in their combos.
Mini-Boss:
Tactical Solutions:
For the Power Leader, beware of surprise attacks from his scythe as he swings very quickly. Otherwise it's occurrence is only every few seconds in between, and easily predictable.
For the Assassin Champion, stay level with him and he won't throw those needles around so much, although the magic shot is as surprisingly as any because it fires fast. If he uses the special move, simply dodge over. There's plenty of leeway for you not to be caught in it's attack.
Boss:
(Threat Level: ↑↑) (Offensive Power: ↓)
Drawl inherits all the mentioned properties from the Power Leader but is deadlier in 2 combined ways.
Tactical Solutions:
Due to such cunning changes, Drawl needs to be engaged with caution. While it is desirable to kill bosses quickly, skill choice may matter against Drawl, especially those with fast execution speeds are favourable. Hanging around too long due to long animations can result in being in the midst of his fire squalls, and depending on the player's fortitude, can result in fatal consequence.
(Threat Level: ↑) (Offensive Power: ↓)
Veron also inherits the properties from the Assassin Champion but is still far less dangerous than Drawl would be.
Tactical Solutions:
Stay level, don't change elevation too often unless you have to. The only thing you have to look out for is his magic shots, which again deal high damage but is done infrequently. Burst damage is favoured due to how quickly Veron will disappear into the air when he uses his special. Nonetheless, a tenacious player with good dodging skills will easily hand Veron's sorry ass over to him.
Note:
By now it should be very clear that the boss selection is random and the portals only affect which stage layout you will fight in. Theoretically by design, the top stage is easy to fight with Drawl in, while the bottom is easier to fight with Veron in.
Regulars:
 | |
| Black Wood Assassin |
(Threat Level: ↓) (Offensive Power: ↑)
Assassins are armed with claws and attack with a single damaging slash. They are capable of running and also quickly teleporting behind their opponent to attack.
- They no longer use the combo attack which could inflict substantial damage and stun.
- An un-carded and unmentioned enemy is the Black Wood Scout. Scouts carry daggers and attack by zipping across a straight line towards you, then stabbing you for a very long stun if the blows connect.
- Beware when Scouts attack, they can quickly change their direction of attack even if you try to avoid them by jumping over them. Also, do not allow Scouts to overwhelm you, as their stuns can put you at high risk of other connecting attacks.
 | |
| Fire Hammer Smith |
Smiths no long attack via melee, and opt to throw their hammers instead. Going close to them causes to often avoid you instead, though this is not always the case.
- Another un-carded and unmentioned enemy is the Fire Hammer Torchman. They can be equally dangerous if you fall into their bomb traps too often.
- Their fire attack has been toned down that it deals lesser damage.
 | |
| Fire Hammer Berserker |
The Berserkers are similar to Brutus from the Goblin Work Site, except that they are less dangerous as compared to him even at their level. They will use a simple smash attack or "Jump" attack only, otherwise they're easy targets.
- Does not perform the spinning attack as suggested otherwise. Much easier than Brutus.
Mini-Boss:
 | |
| Spiderbot Guard |
The only thing going for this mini-boss is his fast attack speeds. Much of the damage it used to deal has been reduced and it doesn't boast a lot of HP for a Mini-boss either.
- The machine gun has a minor splash area. Make sure to completely clear away from the aiming reticle to avoid being shot at the sides.
- Its mine-spray is very much faster.
- The fire beam also strikes much faster before the indicator even appears.
Tactical Solutions:
Its nastiest attacks are the fire beam and the machine gun which it uses more often than its mines. This also forces players to reposition often to avoid getting hit. Stall its attacks by changing elevation as much as you can.
Boss:
 | |
| Talin Elfbane |
In all fairness, this guy was very dirty at first. So I'm glad they decided to dumb him down and his attacks. But who's ever heard of a cannon shell that flies that slowly?
- No longer uses the triple volley fire of the cannon, and its shell speed has been dramatically reduced.
- They finally decided to do something about that dirty homing bomb and reduced its life span and travel speed.
- The flame device that Talin throws out remains the same but no longer causes hitstun if the player walks into the flames.
Tactical Solutions:
Despite the obvious downgrades, don't be fooled. Talin still boasts high attack power capable of wasting you with each attack. The only thing you no longer need to worry about is again, that bomb. Use dodge efficiently here as you will need it often to get behind him, and Talin is sometimes too tall a target to cross over safely before he already attacks you with something.
==============================================================================================================
Under Hammer
Regulars:
 | |
| Iron Dwarf Engineer |
(Threat Level: ↑) (Offensive Power: ↑)
Bombs away with this dwarf. If you allow him to start throwing bombs, he can enter a throwing streak until you force stop him otherwise.
- Beware even when jumping past him, as his lobbing trajectory can suddenly go backwards.
- They no longer use their shoulder-launched projectiles.
 | |
| Iron Dwarf Overseer |
They used to be a problem because they could perform jump attacks when changing elevations, all they have left is a slow melee combo to go for.
- They no longer use their jumping attack, so less worries about them clobbering you as they jump.
 | |
| Fire Hammer Smith |
(Threat Level: ↓↓) (Offensive Power: ↓)
The same kind Hammer's Reach. No longer attacks by melee, runs around you until they want to throw their hammers at you.
(Threat Level: ↓↓↓) (Offensive Power: ↓↓)
These sturdy brutes do not fall but pose very little threat at all. Drillers used to move only when their HP was below 50%, but no longer as they can move freely now.
Mini-Boss:
The same kind Hammer's Reach. No longer attacks by melee, runs around you until they want to throw their hammers at you.
- Unlike the previous mention at Hammer's Reach, Fire Hammer Torchmen do not appear here.
 | |
| Fire Hammer Driller |
These sturdy brutes do not fall but pose very little threat at all. Drillers used to move only when their HP was below 50%, but no longer as they can move freely now.
- They no longer drill up rocks from the ground thus removing that one annoyance they caused for everyone.
Mini-Boss:
 | |
| Power Shovel |
(Threat Level: ↓) (Offensive Power: ↓)
The Power Shovel has been heavily nerfed as a Mini-boss, although it can still attack fast and suddenly with it's shovel bucket.
The Power Shovel has been heavily nerfed as a Mini-boss, although it can still attack fast and suddenly with it's shovel bucket.
- No longer uses the spin or bomb attacks.
- The missile shockwave has been drastically reduced. The indicator is also inaccurate as it will always fall straight to the ground instead of exploding where it is marked.
Tactical Solutions:
The bucket arm is the thing you should keep an eye out for. Not only does it have reach but the arm is full contact meaning touching any part of it when it swings will register a hit on you, it can also hit anything one platform beneath the point of impact. But without that ridiculous missile shockwave and spin attack, the Power Shovel is easier to stay on and bring down.
Boss:
 | |
| Sentry Keeper 01 |
The 01 is generally a ranged attacker although it is capable of both aspects, due to the way its weapons work. In the range aspect, its primary weapon is a large cannon shell that is triggered to explode at your last tracked location when fired. Since it can only attack what is in front, rolling towards his back often works for evasion.
- 01 counters very quickly and suddenly, unlike 02's telegraphy when attacking.
- Its beam special is no longer as lethal from before but accumulates as heavy damage if taken in full blast. This attack should rarely come from off-screen (unless provoked by a teammate elsewhere)
 |
| Sentry Keeper 02 |
Like 01, the 02 is a melee attacker but is capable of both due to its weapons. In the melee aspect, the chainsaw can catch anything in 360° around it within a small radius. Dodge now settles this problem as it is available to everyone and has invincibility frames.
- The blue energy blast is now an impact projectile. It travels visibly slower and no longer stuns, removing the opportunity of MP breaks to save them from damage.
- Its special attack now deals heavy burst damage from just one fireball alone, god forbid if you accidentally take 2 or more in the face.
Tactical Solutions:
Depending on your caliber, this could potentially be one of the most dangerous boss fights for casual players. Despite having dramatically lowered HP as a boss pair, their attacks are severely upgraded and deal massive burst damage all over the place. Taking them down together is not always the ideal conclusion but it saves a player from a lot of later pain. Do not rush against them- this is a high-adrenaline boss fight that requires a good level of tenacity and sharp wit in tackling them both.
Be warned that their Enrage mode will boost the surviving Sentry with 2x damage and defense, turning them into extremely lethal attackers.
==============================================================================================================
Thunder Hammer
Regulars:
 | |
| Tech Guard |
(Threat Level: ↓) (Offensive Power: ↑)
A semi-support attacker capable of hindering your movement with a special non-damage adhesive. Not an especially strong attacker and telegraphs his attacks way too obviously.
- No longer uses the two-sided attack from his lance, removing his ability to quick counter.
 | |
| Mecha Taurus |
The Mecha Taurus is a cousin to the Spiderbot Guard found in Hammer's Reach, but a very much weaker variant. However, it boasts unusually high HP for a regular mob.
- This variant no longer uses it's machine gun attack.
- It only ejects 2 mines compared to the 4 by the Spiderbot. And it does so much slower as well.
 | |
| Thunder Hammer Rifleman |
(Threat Level: ↑) (Offensive Power: ↑)
Rifleman are more an annoyance than threat if allowed to generate crossfire amongst their allies. They're not very tough so they can be easily put down.
(Threat Level: ↓↓) (Offensive Power: ↑↑)
The Guards are weaker in general and offer little threat. But their counterattack resistance remains high and dangerous to careless players.
Mini-Boss:
Rifleman are more an annoyance than threat if allowed to generate crossfire amongst their allies. They're not very tough so they can be easily put down.
- They no longer use their skill shot
- If you allow them to hit you, they may enter a shooting spree against you.
- Once Riflemen gain awareness of your position, they have global sight of you and may attack from off-screen.
 | |
| Thunder Hammer Guard |
The Guards are weaker in general and offer little threat. But their counterattack resistance remains high and dangerous to careless players.
- They no longer use their charging attack or their upward swings.
- Avoid knockdown attacks to efficiently destroy them. All such attacks will only be met with vehement counter resistance and as well greatly increased defense.
Mini-Boss:
 | |
| Void |
(Threat Level: •) (Offensive Power: ↓↓)
Void appears as an unusually early mini-boss, whose purpose is to merely antagonize you into chasing him away with a lot of work (if you're going solo)
Void appears as an unusually early mini-boss, whose purpose is to merely antagonize you into chasing him away with a lot of work (if you're going solo)
- Void's damage has been heavily reduced, so it's not as risky a fight against him.
Tactical Solutions:
In a team of at least 2, both players(teams) simply need to wait end on end to quickly deliver enough hits to him whenever he teleports around. If you're solo, tough luck, it'll take a while longer than usual. Don't waste your powerful skills on him unless they have high hit counts, as all damage to Void is dealt as "1" and he cannot be technically stunned, allowing him to just teleport away in the midst of a multi-hit attack.
Boss:
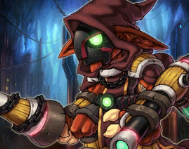
 | |
| Arawn |
Arawn can be slightly difficult as he possesses some annoying attacks with large splash range and a skill that actually creates delay against you. Depending on how good your evasion sense is, that can spell trouble otherwise.
- Arawn uses all his attacks and faces no restrictions, making him a formidable boss coupled with support mobs in his fight.
- The Hammer Drop now only deals a single hit of burst damage. Depending on circumstance, that can be lethal enough.
| ||
| Thunder Hammer Defender |
The uncarded Thunder Hammer Defender is found only with Arawn and can be resummoned by him at will. Despite their notorious and historical toughness, the ones defending Arawn are pretty toned down and easier to defeat.
- These Defenders will use the axe throwing attack, everything else about them is the same as the Guards.
- Be sure to defeat both Defenders if you engage them, as killing one is enough for Arawn to resummon a fresh pair - and then you have to deal with THREE Defenders.
Tactical Solutions:
Arawn is stationary most of the time but can quickly attack with his hammer swings. Always be alert and try to level with him if you can, as the elevation change game is not in your favour with the shockwave produced from his jumps, although it's only chip damage. Taking down the stubborn Defenders will ease the pressure for you, at least until he resummons them.
Note:
Arawn appears as Archimedia's Gate Boss with 87x HP. Do not be fooled as this Arawn variant is extremely deadly! Particularly 3 of his attacks, the regular melee smash, the fire pillars he summons and the hammer drop all deal immense damage in just one blow. (I received 3000+ per hit for the record, the hammer drop is cumulated damage)
Unless you have a death wish and are amply fortified, do not engage this Gate Boss carelessly.
==============================================================================================================
Relics of Kounat
Regulars:
(Threat Level: ↓↓↓) (Offensive Power: ↑)
 | |
| Garou |
Garous are no longer threatening as their pressuring presence as been removed. They idle too much, too long and will only attack you with their high speed barrage of claw attacks, which even rarely occurs
- Because they no longer use the random jump attack nor the feral rush they use on the ground racing around, they're practically as good as useless.
 | |
| Garou Mage |
The Mage on the other hand is contrastingly stronger than the Garou. With the ability to cast homing projectiles, it forces players on their feet to avoid them.
- They no longer use the magic shockwave to knock you away if you approach them up close.
 | |
| Garou Berserker |
Berserker remain about the same but slightly weaker than before. They used to deal large amounts of damage is you were unfortunately caught in their combos.
- No longer attacks with the single slash, only attacks via the combo of furious slashes.
Mini-Boss:
Power Leader *No Card Image*
(Threat Level: ↓) (Offensive Power: •)
The 1st Mini-boss to appear at the beginning of the 3rd wave. The Power Leader is a lesser version of Drawl but is much less threatening than he is. Due to his size, he is easily a good target for wide-area attacks and can quickly go down in seconds.
(Threat Level: ↓) (Offensive Power: •)
The 1st Mini-boss to appear at the beginning of the 3rd wave. The Power Leader is a lesser version of Drawl but is much less threatening than he is. Due to his size, he is easily a good target for wide-area attacks and can quickly go down in seconds.
- No longer uses the fireball attack.
- Stomps the ground less often.
- Its charge attack with the scythe has longer delay before damage is dealt. It no longer hits when he charges but rather only when he swings up near the end, giving a player ample time to evade.
- Changing elevation will allow him to attack more often with the scythe.
Assassin Champion *No Card Image*
(Threat Level: ↓) (Offensive Power: ↓↓)
The 2nd Mini-boss to appear at the end of the 4th wave. The Assassin Champion is a lesser version of Veron but is not much weaker than he is. Their most hurtful attack is now the high-speed magic shot they use, where the spread of needle projectiles they use barely reach that amount of hurt.
The 2nd Mini-boss to appear at the end of the 4th wave. The Assassin Champion is a lesser version of Veron but is not much weaker than he is. Their most hurtful attack is now the high-speed magic shot they use, where the spread of needle projectiles they use barely reach that amount of hurt.
- No longer uses that evil whirlwind attack, to our relief.
- Damage from his special attack has been heavily reduced, further reducing the threat he poses even as a Mini-boss.
Tactical Solutions:
For the Power Leader, beware of surprise attacks from his scythe as he swings very quickly. Otherwise it's occurrence is only every few seconds in between, and easily predictable.
For the Assassin Champion, stay level with him and he won't throw those needles around so much, although the magic shot is as surprisingly as any because it fires fast. If he uses the special move, simply dodge over. There's plenty of leeway for you not to be caught in it's attack.
Boss:
 | |
| Drawl |
Drawl inherits all the mentioned properties from the Power Leader but is deadlier in 2 combined ways.
- His special, the fire squall can be used without going below an HP threshold and it activates almost immediately once Drawl turns over. While it is not as lethal as before, it becomes difficult to escape from with such fast response.
- The special is usually triggered as a counter response to heavy/rapid damage but he can now use it at will, which makes it all the more unpredictable.
- It also no longer drains MP if you touch him directly.
Tactical Solutions:
Due to such cunning changes, Drawl needs to be engaged with caution. While it is desirable to kill bosses quickly, skill choice may matter against Drawl, especially those with fast execution speeds are favourable. Hanging around too long due to long animations can result in being in the midst of his fire squalls, and depending on the player's fortitude, can result in fatal consequence.
 | |
| Veron |
Veron also inherits the properties from the Assassin Champion but is still far less dangerous than Drawl would be.
- Damage does go up with Veron's attacks, but with no extra challenge, he remains a gloried Assassin Champion by ability.
- His special, unlike Drawl's is mostly triggered as a counter response, rarely used by his own volition.
- It doesn't deal as much damage as before and has no MP drain if you were to touch him.
- A player with smart movement techniques can easily avoid spreading the special attack too far, if teammates are present.
- Without the whirlwind traps to restrict and hinder movement, he makes it easy for players to escape all his attacks.
Tactical Solutions:
Stay level, don't change elevation too often unless you have to. The only thing you have to look out for is his magic shots, which again deal high damage but is done infrequently. Burst damage is favoured due to how quickly Veron will disappear into the air when he uses his special. Nonetheless, a tenacious player with good dodging skills will easily hand Veron's sorry ass over to him.
Note:
By now it should be very clear that the boss selection is random and the portals only affect which stage layout you will fight in. Theoretically by design, the top stage is easy to fight with Drawl in, while the bottom is easier to fight with Veron in.
==============================================================================================================
No comments:
Post a Comment